Noise travels in all directions, and ceilings are a major pathway for unwanted sound. Footsteps from above, echoes from high ceilings, and floor-to-ceiling room-to-room transfer often carry farther than homeowners expect. This article covers practical methods and the best materials to use for soundproofing ceilings that fit multi-level homes and other high-noise areas.
Why Soundproofing Ceilings Is Important
Ceiling assemblies directly affect how sound moves between floors and how private a space feels once occupied.
- In multi-story homes, untreated ceilings allow footsteps, voices, and music to transfer through framing connections, leaving rooms below feeling exposed even when wall insulation is present.
- Within individual rooms, ceiling conditions shape how sound behaves.
- Tall volumes and hard finishes increase echo and reverberation, which can amplify everyday noise rather than contain it.
- In offices, apartments, and multi-use residential spaces, soundproofing ceilings establishes predictable acoustic separation without altering layouts or ceiling heights.
Impact noise tends to be the most disruptive. Footsteps and everyday activity upstairs can sound louder than expected downstairs because the ceiling and floor framing carry that vibration. Dealing with it early helps keep the rooms below quieter once finishes are in.
Best Applications For Soundproofing Ceilings
Ceiling sound control matters most in the rooms where overhead noise causes the greatest disruption.
Between Floors
Ceilings separating finished levels represent one of the highest-impact opportunities for acoustic control. Bedrooms beneath kitchens or living rooms commonly experience impact noise from daily activity above. Offices or studios below high-traffic zones face similar challenges when joist cavities remain partially filled or untreated.
Penetrations complicate these assemblies. Lights, pipes, and ducts create openings in the ceiling that sound can pass through if they aren’t sealed properly. When soundproofing ceilings between floors, the insulation needs to fill the entire cavity so sound has nowhere to slip past it, and edges should be sealed before drywall goes up to keep noise from finding easy paths around the insulation.
Finished Basement Ceilings
Finished basements often become guest rooms, media spaces, or home offices while remaining directly beneath active living areas. Without ceiling sound treatment, overhead noise persists as a daily distraction. Soundproofing insulation for ceilings helps quiet basement spaces by absorbing airborne noise in the cavity and reducing how strongly overhead footsteps and activity are transmitted into the room below.
Basement projects also introduce additional electrical and mechanical work. Planning insulation coverage and sealing around new cutouts for lights, ducts, and wiring before drywall goes up keeps those openings from turning into permanent sound paths.
Home Offices, Studios, And Nurseries
Spaces that depend on consistent quiet benefit from ceiling sound control even when wall assemblies are insulated. In nurseries and home offices, small amounts of noise can interrupt sleep or concentration when ceiling cavities are left untreated. Installing soundproofing materials for ceilings helps these rooms stay calmer during normal activity in the spaces above.
These rooms are frequently located beneath hallways, stairs, or laundry areas where regular movement is common. Treating the ceiling assembly reduces how noticeable that upstairs activity feels in the room below.
Required Tools and Materials for Ceiling Soundproofing
Before you begin, having the right tools and materials on hand makes your project smoother and ensures the best acoustic results.
Essential Materials
For most ceiling soundproofing projects, you’ll need:
- Dense acoustic insulation, such as recycled denim batts, to absorb sound within the ceiling cavity.
- Resilient channels or sound isolation clips if you plan to decouple the ceiling and reduce vibration transfer.
- Acoustic drywall or a double layer of standard drywall to block airborne noise.
- Sound-damping compound (if using multiple drywall layers) to limit vibration as sound passes through.
- Acoustic sealant for sealing gaps and perimeter joints, preventing sound from leaking through small openings.
Tools You’ll Need
Gather these basic tools before starting:
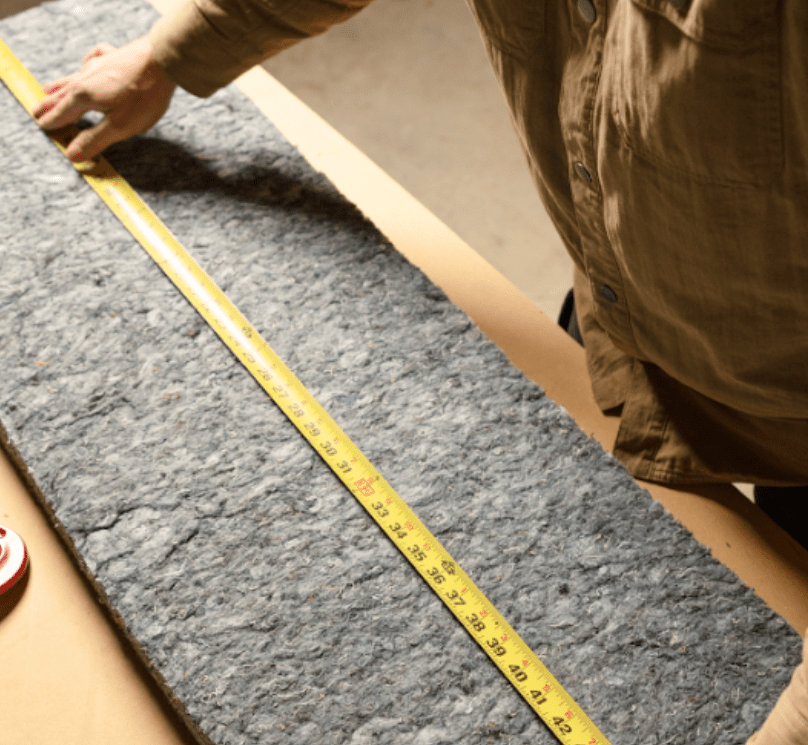
- Blade for cutting insulation batts to fit snugly.
- Tape measure and straightedge for accurate measurements.
- Staple gun or insulation supports, if needed to secure insulation.
- Power drill and screws for installing channels, clips, or drywall.
- Caulking gun for applying acoustic sealant.
- Safety gear: (Optional if using Quiet Denim) gloves, safety glasses, and a dust mask.
The Importance of Preparation
Laying out all your tools and materials before you start helps the installation process go smoothly and minimizes interruptions, especially important when working overhead. Choosing eco-friendly, non-toxic materials like Quiet Denim insulation not only provides reliable sound control but also supports a healthier indoor environment.
Top Soundproofing Materials For Ceilings
Choosing the right materials determines how effectively a ceiling absorbs, blocks, or limits overhead noise.
Acoustic Batt Insulation
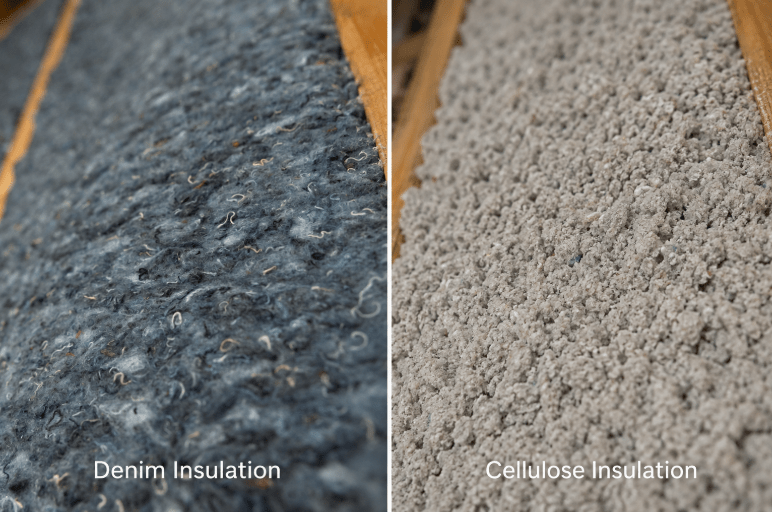
Dense fiber batts are commonly used in residential ceiling assemblies to absorb airborne sound and reduce noise transfer between floors. Materials such as denim insulation absorb sound within the cavity, limiting vibration transfer before it reaches finished surfaces. Made from post-industrial recycled denim, this insulation prioritizes noise absorption, is easy to cut and fit, and works especially well in ceiling cavities between conditioned floors.
Quiet Denim is safe to touch, formaldehyde-free, low in VOCs, fire rated, and mold and mildew growth resistant due to applied compounds. Its friction-fit design makes for an extremely simple install in ceiling joist bays, where full contact and complete cavity fill support consistent acoustic performance. For many residential builds and remodels, soundproofing ceilings begins with a dense batt layer before surface upgrades are considered.
Resilient Channel Or Sound Isolation Clips
Resilient channels and sound isolation clips work by separating the drywall from the joists, which reduces how much vibration transfers into the ceiling surface. This approach is most effective when the ceiling cavity is insulated, since the two layers address different parts of the noise path. These systems typically add only a small amount of depth to the ceiling.
Acoustic Drywall Or Double-Layer Drywall
Adding more drywall adds mass, which helps block airborne sound like voices and music. A common upgrade is two layers of drywall with a sound-damping compound such as Green Glue spread between them, which reduces vibration as sound tries to pass through the ceiling. This approach works best when the ceiling cavity is insulated, since insulation absorbs sound in the cavity while the drywall layers help block what reaches the surface.
Ceiling Tiles Or Acoustic Panels
In drop ceilings or open commercial spaces, ceiling tiles and acoustic panels help control echo and reverberation rather than blocking inter-floor noise. These treatments reduce reflected sound within a room and are commonly used in offices, classrooms, and finished basements with exposed ceiling systems.
Installation Tips For Ceiling Soundproofing
Ceiling soundproofing works best when the insulation fills the cavity completely and fits snugly without being compressed. Gaps leave open routes for noise, and compressed batts lose the sound-absorbing benefit they’re supposed to provide.
- Before drywall goes up, seal around ceiling openings like lights, vents, ducts, and wiring using an acoustic sealant, which stays flexible so it doesn’t crack as the house moves.
- Run the same sealant along the perimeter where the ceiling meets the walls to close small cracks that can leak sound.
- For the strongest results, treat the ceiling as a system by pairing insulation with a surface upgrade, such as a second drywall layer with a sound-damping compound, and a framing break like resilient channel or isolation clips.
If you’re building or doing a major remodel, plan these details during framing so each layer can be installed cleanly without rework later.
Choose Quiet Denim For Ceiling Soundproofing Projects

Ceiling noise often shows up after the house is finished, when footsteps, voices, and everyday activity upstairs become hard to ignore in the rooms below. Soundproofing insulation for ceilings helps by filling the cavity with a dense, sound-absorbing layer, which reduces how much noise carries between floors.
Quiet Denim adds that absorption with a friction-fit design that makes for an extremely simple install. It is safe to touch, formaldehyde-free, low in VOCs, fire rated, and mold and mildew growth resistant due to applied compounds. If you’re building new or finishing a basement, soundproofing the ceiling early is one of the simplest ways to prevent noise problems you’ll otherwise live with later.